
Importing and Optimizing Models
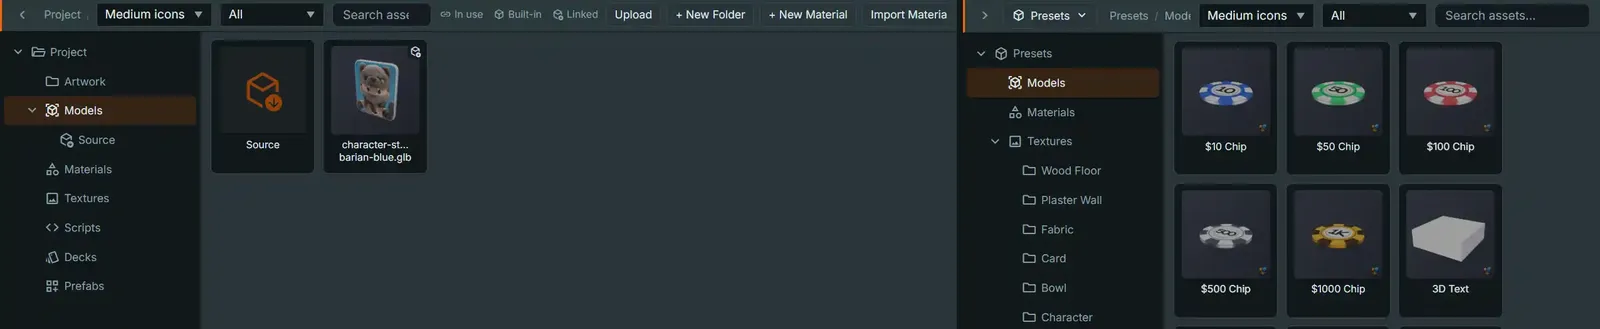
What the importer accepts#
Everything the importer produces converges on one self-contained binary .glb — that is
the only format every later stage (bake/repair, the Model
editor's inspection and optimize operations, the runtime
loader, and the mod's GitHub repo, which stores one file per model) actually reads
(apps/web/src/ui/editor/modelConvert.ts). Three kinds of upload get you there:
-
A binary
.glb— uploaded as-is. No conversion step. -
A
.gltfJSON document plus its external.bin/texture resources, selected together — packed client-side into one.glb. -
A DCC/interchange model, converted in the browser through an assimp WebAssembly build before it ever reaches the normal upload path. The supported set, each verified end-to-end against a real sample (
apps/web/src/ui/editor/modelImportFormats.ts):Extension Format .fbxAutodesk FBX .objWavefront OBJ (select its .mtland textures alongside it).daeCOLLADA .stlStereolithography .plyStanford Polygon .3ds3D Studio .3mf3D Manufacturing Format .offObject File Format .lwoLightWave Object .xDirectX .x Select the model and any companion files (a
.mtllibrary, referenced textures) together in one drop or one file-picker selection — a companion referenced through a subdirectory (mtllib sub/x.mtl) won't resolve, so flatten the folder first. A texture the model references but that isn't in your selection is substituted with a white placeholder rather than failing the whole import, and is named in the conversion result so you know what to re-import.
Only one convertible model may be selected at a time — the router refuses a batch with more
than one (pickModelImportRoute), because companion resolution is by filename and two models
sharing one selection would fight over the same textures.
Draco-compressed models#
A .glb that declares KHR_draco_mesh_compression is accepted and renders correctly on the
table — the runtime has its own Draco decoder, initialized at startup
(apps/web/src/playcanvas/loadDraco.ts; wired in TabletopRuntime.ts). What Draco costs you is
the editor's own tooling: gltf-transform (the library the Model
editor's Errors & stats panel and every Optimize operation are
built on) needs a draco3d decoder that isn't a dependency here, so a Draco model always
inspects as empty stats with a warning, and Optimize is unavailable
(apps/web/src/ui/editor/modelInspect.ts). Decompress it outside the editor (for
example npx @gltf-transform/cli copy model.glb model-out.glb) and re-import the result to get
stats and Optimize back — the model itself was already fine on the table the whole time.
Reading the Errors & stats panel#
Opening a project model in its own tab (double-click it in the asset explorer) shows triangle and vertex counts, mesh/primitive/material/texture counts, and per-texture dimensions and byte size, plus two budgets that turn into warnings rather than hard errors:
- 150,000 triangles (
MODEL_TRIANGLE_BUDGET) — above this, "Simplify to N%" is the fix, but note that the ratio is a target the quality setting can override, and that a model made of many small parts may not decimate at all. See Item editors: Model. - 2048px on either side of an embedded texture (
MODEL_TEXTURE_SIZE_LIMIT_PX) — "Re-encode textures" with a max size of 2048 shrinks it back down.
Missing vertex normals and a normal map with no tangents are also flagged, each pointing at a one-click repair ("Repair normals" / "Generate tangents"). None of this blocks upload — a model with every warning still spawns and plays; the panel exists so you notice before your peers download an 80MB deck box.
Optimizing without losing the original#
Every Optimize action (Clean up, Simplify, Re-encode textures to WebP, Repair normals, Generate
tangents) stages a result — it shows a before/after comparison and waits for Apply or
Discard, and never touches your file until you apply it. Before the very first Apply, the
editor snapshots your untouched bytes to originals/<stem>.glb in the project tree, which is
what Revert to original restores from later — including after an embedded-texture replace,
which goes through the same path. See Item editors: Model
for the full Apply/Discard/Revert mechanics.
Splitting a scene, and putting it back together#
A model that contains a whole authored scene — a building, a room, a kitbash — can be split
into parts (the tile's split button, or right-click → Split into parts…). Each top-level
part becomes its own model, and the original is kept. For models/castle.glb the split writes:
models/castle/castle-tower.glb          one model per checked part
models/castle/castle-gate.glb
models/castle/castle.assembly.json      the parts, put back together
The parts appear in a castle sub-folder of Models, beside the assembly — listed as
castle (assembly). An assembly is placed exactly like a model: drag it onto the table, or pick
it as room scenery. It renders every part at the position it had in the source file, so the
split model still reads as one thing.
Place the assembly in the dialog decides what happens straight away:
- As environment scenery (the default) — one environment scenery placement at the origin, which reproduces the source exactly.
- On the table — one table entity, like placing any model.
- Don't place it — just write the files.
The position of each part is not a guess. The editor measures each part's world bounds in the source file and records its X/Z centre and its lowest point — the exact inverse of how the runtime rests an imported model (X/Z centre to the origin, minimum Y to the base). Because it is derived from that rule rather than tuned to match it, the two cannot drift apart. A part with no renderable geometry starts at the assembly origin, and the status line says so.
Each part is written on its own origin. A part's geometry is recentred so the piece sits at
the bottom centre of its own file — X/Z centred, resting on Y = 0 — rather than inheriting the
coordinates it happened to have in the source scene. Without this a chess king extracted from a
board would carry the board's origin: opened on its own, the model would render a scene-width
away from its origin marker, its bounds box and its collider. Recentring does not affect
reassembly, because the placement above is measured on the source file before any of it happens.
It is also the point the runtime rests a model on, so each part is written already at rest, with
originAuthored set to say so.
If you have older split parts with the problem, open each one and use Recenter origin in the Model editor's ORIGIN panel.
Splitting again never overwrites anything: parts that already exist get a numbered name, and if
castle.assembly.json exists the new split writes castle-2.assembly.json beside it, so an
assembly you have adjusted is never replaced. The parts keep the source model's
materials and inherit its credit in the Credits tab.
Adjusting an assembly#
Double-click an assembly to open the Assembly tab. Each part has:
- Model — replace the part's model with another project model; its position, rotation and scale are kept.
- Position, Rotation (°) and Scale — typed, or nudged with the
x−/x+buttons (0.01 ft, 1°, 0.01; holdShiftfor ten times that). Rotation and scale pivot about the part's base centre, so resizing a tower does not swing it across the scene. Uniform scale keeps the three axes equal. - Reset puts one part back to its saved values; Remove takes it out of the assembly (its model file stays in the project).
Add part puts another project model into the assembly at the origin. Save checks the assembly first and shows any problem on the part it concerns — an assembly cannot contain another assembly, and scale must be above zero. Wherever the assembly is placed, it reloads after you save. Save Draft and Publish also save an open Assembly tab with unsaved changes.
Two reasons to split a scene rather than import it whole:
- Publishing. One enormous GLB can exceed the size a single upload allows. Split parts upload independently.
- Control. Parts can be hidden, replaced, re-materialled or removed individually, and only the parts you check are extracted at all.
The option only appears when the parts have measurable positions, and a part with no renderable geometry is left for you to place by hand rather than dropped at a wrong guess.
Giving a model a collider#
A model arrives with no authored collider, and the runtime fits a box to its measured
bounds. That is right for most pieces and visibly wrong for some — an arch a piece should drop
through, a bowl, an L-shaped tile. Authoring one is the Model tab's COLLISION panel, and the
choice comes down to three routes:
| The model is | Use | Why |
|---|---|---|
| Roughly a box, ball, disc or capsule | A primitive entry, Fit to bounds then adjust |
Cheapest to simulate, and exact numbers you can read. |
| Convex, and its silhouette matters | Convex hull | An accurate shell, and valid for a moving piece. |
| Concave, and it never moves on its own | Triangle mesh with a static body type |
The only shape that keeps a hole a hole. |
| Concave, and it does move | Several primitive entries — up to eight, each with its own offset, rotation and scale | A triangle mesh cannot be dynamic; a hull fills the concavity in. |
Baking and decimating a collider#
A mesh-derived collider takes its geometry from the render mesh live while its Collider
model slot is empty, and from whatever .glb you put in that slot otherwise — a bake fills
it with <stem>.collider.glb written beside the model, or you can pick or drag in any other
project .glb, including one you baked for a different model.
Bake when the render mesh is too heavy to collide against. The collider budget is 2,000
triangles — a completely separate, far smaller budget from the 150,000-triangle render
budget above — because the hull builder feeds every vertex of the source into the shape with no
reduction at all, so a 40,000-vertex model becomes a 40,000-point hull that costs real time on
every contact. Errors & stats carries a Collider tris row, and over budget the panel offers
a one-click Simplify to fit that decimates and bakes in one step.
Three things to know:
- Baking never touches the render model. It writes a separate sibling file, so your GLB
stays byte-identical and
Revert to originalkeeps working. This is the opposite of Optimize, which rewrites the model in place. - Emptying the Collider model slot unpoints the entry but does not delete the file. Delete
the orphaned
.collider.glbyourself, or it publishes to GitHub with everything else. - Baking is a project-model activity. A built-in preset's bytes ship with the app, so an admin can change a preset's collider settings in production but cannot bake one there.
Full control-by-control detail is on Item editors: Model.
Common mistakes#
- Expecting FBX/OBJ/STL to fail. They don't — they convert automatically through the
in-browser assimp pipeline described above. What does fail cleanly is a format assimp can
read but that isn't on the verified list (an untested extension silently producing an empty
mesh was judged worse than refusing it) — re-export as
.glbor one of the listed formats. - Assuming a Draco warning means the model is broken. It renders fine on the table; only the editor's own inspect/optimize tooling can't see inside it until you decompress it.
- Selecting only the model file for an OBJ/FBX with external textures. Select the
.mtland every referenced image alongside the model, or they come through as white placeholders. - Ignoring the triangle/texture warnings because upload succeeded. Nothing blocks you, but every peer in a multiplayer room downloads and renders this model — a budget warning today is a slow table for everyone tomorrow.
- Assuming the render triangle budget is the collider budget. They are different numbers by two orders of magnitude — 150,000 for what you see, 2,000 for what you collide with — and a model comfortably inside the first can be badly over the second.
- Choosing
Triangle meshon a piece that moves. It is silently downgraded to a convex hull, which fills in the very concavity you picked it for. The panel warns; read the warning.
See also#
- Item editors: Model — the full tab reference: the model tree, COLLISION and TRIGGER VOLUME, viewport toggles, spawn defaults, Optimize, embedded-texture replace
- COLLISION — the three conditions the runtime refuses a mesh-derived collider under
- Importing a model — the click-path walkthrough
- Working with textures
- Mod scripting API —
TableObjectDefinition.scale, resizing an imported model from a mod.