
The Transform Rail
The transform rail is the narrow icon strip pinned to the far left of the workspace
(<nav className="em-rail" role="toolbar" aria-label="Transform tools">). It is 46 pixels
wide, it does not resize, and it holds the tools that decide what a click in the viewport
does.

Reading top to bottom: four transform tools, a divider, the snap-point tool, a divider, Frame selection, then — after a flexible spacer that pushes it to the bottom — Exit.
The four transform tools#
| Button | Shortcut | Gizmo mode | Icon |
|---|---|---|---|
| Select | Q |
select |
arrow_selector_tool |
| Move | W |
move |
open_with |
| Rotate | E |
rotate |
cached |
| Scale | R |
scale |
open_in_full |
Move is the default. transformGizmoMode initializes to "move", not "select" — the
first thing you do in a new scene is usually place something.
The active tool is shown by the active class and aria-pressed. Clicking a tool first
calls exitSnapTool(), so picking up a transform tool always cancels snap-point authoring —
you can never be in two modes at once.
The keyboard shortcuts are bound in the shell's window keydown handler and are ignored
while you are typing: the handler bails out when the event target is an input,
textarea or contentEditable element, which includes the Monaco script editor. No
modifier may be held.
What the tools write#
The rail itself writes nothing to the scene document. It sets transformGizmoMode, which is
handed to the runtime as transformGizmoState={{ enabled: !snapTool, mode, space }}.
Dragging the resulting gizmo is what writes: the runtime applies a transform intent and
the shell mirrors the new position / rotation / scale onto the selected entity in the
scene draft. The same values appear live in the Inspector's ENTITY section.
With a multi-selection the gizmo attaches to every unlocked selection root at once — Move
moves them together, Rotate orbits them about their shared centre, and Scale follows the
SELECTION (N) panel's Scale gizmo setting, spreading on the table plane only — and each
moved entity is written the same way.
See Multi-select.
space comes from the World / Local pair on the viewport
toolbar, not from this rail.
Gizmo behavior, axis handles and snapping are covered in Transform and gizmos.
Snap points#
The fifth button (control_point_duplicate, tooltip "Snap points") opens a flyout of a
visibility toggle plus five sub-tools. It is a toggle in both directions: if the flyout is
open or a sub-tool is armed, clicking it calls exitSnapTool() and everything unwinds.
Show radii#
The first entry in the flyout is not a sub-tool. Show radii draws every snap point's marker and a translucent disc the size of its snap radius — the catchment a dropped piece is pulled into.
It is deliberately independent of the sub-tools: it stays on after you disarm one, so the snap zones remain visible while you place and drag pieces, which is when you actually need to see them. Arming any sub-tool shows the markers regardless.
The disc is drawn from the same snapRadius the drop rule reads. There is one radius per
point and no display-only copy of it, so what you see is what the table snaps to.
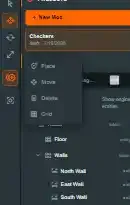
| Sub-tool | What clicking the table does |
|---|---|
| Place | Creates one snap point at the clicked position. |
| Move | Drags an existing snap point to a new position. |
| Delete | Removes the snap point you click. |
| Grid | Stamps a whole configured grid of snap points, centred on the click. |
| Label | Selects the snap point you click so you can name it — or names a whole grid at once. |
Clicking the sub-tool that is already active toggles it off (activateSnapSubTool).
While any sub-tool is armed, the transform gizmo is detached (enabled: !snapTool) so it
cannot intercept authoring clicks, and the runtime renders the snap-authoring rays.
The Grid sub-tool#
Choosing Grid reveals four numeric fields inside the flyout, plus the hint "Click the table to place the grid."
| Field | Range | Step |
|---|---|---|
| Rows | 1–20 | 1 |
| Columns | 1–20 | 1 |
| Spacing X | 0.05–5 | 0.05 |
| Spacing Z | 0.05–5 | 0.05 |
Spacing is in world units (feet).
While Grid is armed, a ghost of the configured layout follows the cursor, so you can see the footprint before committing.
A placed grid stays a grid#
Clicking the table records an authored grid and generates its points from it. The grid
itself is saved with the scene, so it stays editable forever after: its row is selected for
you the moment you place it, and it lives in the Hierarchy under
Snap Points (N) with its generated points
nested inside it.
From there you can change its rows, columns, spacing, rotation and radius in the Inspector, or drag it with the transform gizmos — move repositions the block, rotate yaws it, and scale changes the two spacings. Scale never adds or removes a cell; the counts are typed, so a drag cannot quietly change how many points the grid generates.
Changing any of those regenerates the grid's points. Cell ids are stable, so growing a 4×4 into a 5×5 keeps the sixteen points it already had — including any names you gave them.
Before this, a stamped grid was an ephemeral batch edited through a floating HUD and forgotten when the tool closed: reopening the scene left you with N anonymous points that could never be re-spaced or deleted as a block. Scenes saved that way still load, and their points are simply individual ones.
The Label sub-tool#
Every snap point has a label, and every one starts as Snap point. Labels are what a table
script reads to name a place — world.getSnapPointAt
is how a move log prints "Matt moved White Pawn from e2 to e4" instead of two sets of
coordinates. The Label sub-tool names them two ways.
One at a time. Click a snap point: it is ringed in the viewport and a Label field opens in the flyout. Use this for layouts with no rows and columns — a Monopoly track, a discard pile, a single named slot. Labels are capped at 80 characters.
A whole grid at once. Under Name a whole grid, the flyout works out whether the scene's snap points form one regular grid, and if they do, offers to name them all:
| Scheme | Row 0, column 0 | Example |
|---|---|---|
| Chess (a1–h8) | a1 |
files are letters along the columns, ranks are numbers along the rows |
| Rows × columns (A1) | A1 |
spreadsheet order: the row is lettered, the column numbered |
| Numbered (1–N) | 1 |
reading order, left to right, then down |
The preview is a plan view from above, far edge at the top — the same way round as the default camera, so a label in the preview's top-left corner lands on the top-left square on screen. Three toggles move the naming until it sits where you want it:
- Flip rows — row 1 moves to the other edge.
- Flip columns — column 1 moves to the other side.
- Swap — the scheme's rows and columns trade places, for a board whose files run the other way.
For chess, set them so a1 lands under White's queen-side rook. Name all N writes every label in
one step, and a single Ctrl+Z undoes it.
It works on a grid you placed by hand as well as one stamped by the Grid sub-tool, and it copes with a grid rotated by the grid HUD and with points nudged slightly off their line. If the points are not one regular grid — one missing, an extra one, two separate grids — it says so rather than guessing, and you name them one at a time instead. A plausible-looking wrong name on every square would be worse than none.
Lift N onto table#
When some of the scene's snap points sit under the current play surface, the flyout shows one
more button: Lift N onto table, where N is how many.
This is a repair for scenes that changed tables before a table change carried snap points along (see Assigning a Room or Table). A snap point stores an absolute height, so on a taller table those points are drawn inside the tabletop, where nothing can reach them.
It only counts a point that is more than 0.1 ft below the surface and inside the table's
footprint, so a marker you deliberately placed on the floor or out in the room is left alone.
Pressing it sets each of those points to 0.02 ft above the surface, the height the Place tool
uses. Only the height changes, and one Ctrl+Z undoes it. The button disappears once there is
nothing left to lift.
Escape unwinds one layer at a time#
Escape in the shell walks back through snap authoring in this order, doing exactly one
step per press:
- Finish the active grid batch.
- Disarm the active sub-tool (and its ghost).
- Close the flyout.
- Only then, clear the scene selection.
What snap authoring writes#
Every snap sub-tool writes to sceneDraft.snapPoints:
| Action | Effect on the document |
|---|---|
| Place | Appends one new snap point. |
| Move | Rewrites that point's position. |
| Delete | Removes that point. |
| Grid place | Appends every point in the grid in one go. |
| Grid rotate / scale | Rewrites position and rotationY on every point in the batch. |
| Lift N onto table | Rewrites position.y on every sunk point. |
All of it is draft state, so it is covered by undo and by Save Draft.
Frame selection#
The center_focus_strong button, labeled "Frame selection (F)".
Its handler calls selectObject(selectedSceneObjectId) on the runtime, which re-asserts the
selection: the selection glow is refreshed and the transform gizmo is re-attached to the
selected entity.
The F key and View ▸ Frame Selection in the menu bar run the same handler.
⚠ The camera does not move.
TabletopRuntime.selectObject()updates selection state, glow and gizmo only; there is no camera framing behind this button today. The Hierarchy context menu's Focus item behaves the same way, for the same reason. Treat it as "re-select and re-attach the gizmo" until that is fixed.
Exit#
The last button (logout, "Exit edit mode") sits below a flexible spacer at the foot of
the rail. It calls the same handler as File ▸ Exit Editor — see The
menu bar.