
Assigning and Editing Materials
A material is a Project
Definition — a named set of RENDER
engine component properties (diffuse, specular,
emissive, opacity, textures, …) that any number of entities can reference by id. This page is
about assigning and editing one; the field-by-field reference lives on the Inspector's RENDER
page.
Assigning a material#
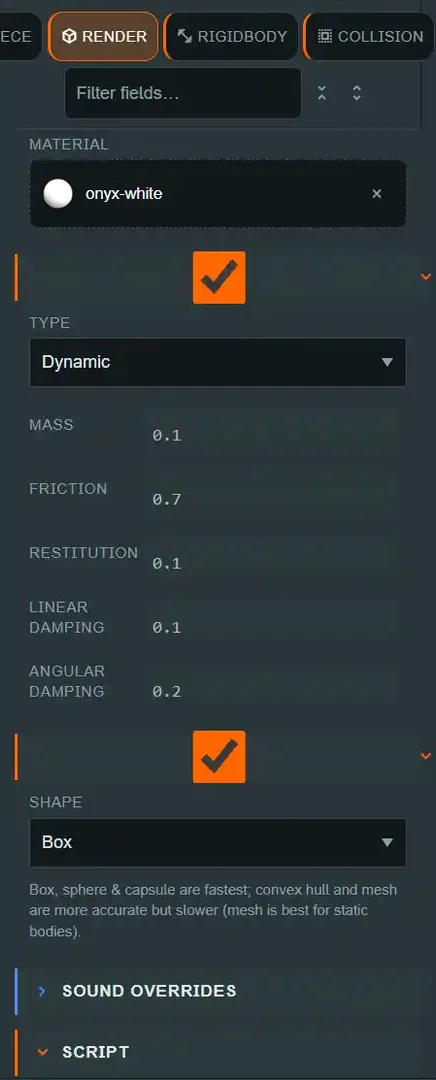
Every place a material can go — an entity's RENDER section, a wall surface, the floor and
ceiling — shows a Material box: a swatch, the material's name, and a small × to clear it.
Material boxes are drop targets. Open the asset explorer's material list, drag a material card
onto the box, and it assigns immediately; there is no separate "confirm" step.
The box also has a matching drag source everywhere a material is picked from (the asset
explorer's material grid), so you can drag directly from there onto an entity's RENDER
section, a wall, or the floor/ceiling without opening the Inspector first.
Built-in vs project materials#
Materials come from two places:
- Project materials live in
sceneDraft.materials— the ones you created, or a built-in you have edited (see below). They show up in the material list, can be renamed, duplicated and deleted, and are visible in every scene the mod ships. - Built-in materials (
BUILTIN_MATERIAL_PRESETS) are read-only presets bundled with DiceyTable — wood, felt, plastics and the like. They are not stored in the project at all; they exist only as code-side defaults, so they can be assigned and used freely, but they cannot be renamed or deleted, because there is nothing in your project to rename or delete.
Assigning either kind to an entity works identically — the entity's RENDER section just
stores the material's id, which resolves against project materials first and falls back to
the built-in presets. This is also why a project material can shadow a built-in one of the
same id, which is exactly what happens next.
The KayKit palette#
Sixteen of the built-ins are named KayKit <colour> — KayKit Blue, KayKit Red,
KayKit Gold, KayKit Walnut, and so on. They are worth understanding as a group, because
they work differently from the surface materials around them.
Every KayKit piece — the meeples, pawns, houses, flags, coins, cubes, tiles, dominoes and chess sets — shares one 35 KB texture: a grid of flat colour swatches. Each model's UVs pick one cell out of that grid, so a model's colour is where it samples, not what its material paints. The sixteen palette materials are therefore identical except for their Offset X / Offset Y — each one shifts the sampled window to a different swatch.
The practical consequences:
- Recolouring a KayKit piece is a material assignment. Assign
KayKit Redto a meeple and it turns red, with no new geometry and no new texture downloaded. - It costs nothing. All sixteen colours, on any number of pieces, are still that one shared texture in memory.
- It only works on KayKit pieces. The offsets are meaningful against that specific atlas;
assigning
KayKit Redto an unrelated model just shifts that model's own texture sideways, which is almost certainly not what you want. - Colours outside the sixteen are a duplicate away. Copy a palette material into your project and edit its Offset X/Y, or point its diffuse map somewhere else entirely.
Multi-material models: assigning per slot#
A model with more than one material exposes a slot per material, listed under RENDER in
the Inspector and labelled with the model's own material names (TimerScreen_mat, d20_mat).
Assign one and only that part of the model changes.
The rows are keyed on the source material name, not on a mesh index. That is what lets an assignment survive re-exporting the model: an index shifts the moment you add a mesh or change export order, and an index-keyed assignment would silently re-point at a different part with nothing on screen to say so. If a model genuinely has two materials with the same name they share one slot — an accepted trade against invisible mis-assignment.
Three levels decide what a given part renders with, most specific first:
- the slot's own assignment;
- the Material (all slots) box above the list — the whole-object shorthand, which is what every scene authored before slots existed uses, and which still means exactly what it did;
- the material the model shipped with.
So an empty slot is not "no material" — it falls back. Clearing a slot restores the fallback rather than leaving the last assignment stuck on.
A single-material model keeps the single control and shows no slot list; one row duplicating the box above it would only be a second way to say the same thing.
Materials from an imported model#
When you import a model, its materials are extracted into the project automatically — one
project material per material the GLB actually uses, named <model> · <material name>, plus
every embedded texture written out as a project texture file. They are filed together: the
materials in a Materials / <model> sub-folder of the Asset Explorer and the textures under
textures/<model>/, so a model's files do not mix with the next import's. The <model> · prefix
stays in the name because material pickers show a flat list. Models imported before this keep
their files where they are. Before this, a model's materials
were locked inside its GLB where the editor could neither show nor edit them, and an import
produced only the model and its textures.
Three things worth knowing about what you get:
- Materials no mesh uses are skipped, and the upload status says so. Exporters routinely leave orphans behind; importing them would fill your material list with entries that cannot affect anything.
- A shared image becomes one file. Two materials referencing the same texture produce a single project texture, not two copies.
- Anything that could not be represented is reported, not silently dropped — a texture on a
second UV set, a
KHR_texture_transform, or an extension the converter does not handle.
The extracted materials are the ones the model uses. Import also removes the images from the
GLB and records which project material each of the model's materials became, in the model's
.meta.json sidecar under materialSlots. Every spawn of the model
inherits that binding, so the model looks exactly as it did — and editing one of those materials
now changes the model, which is the whole point of extracting them.
Two consequences worth knowing:
- The texture bytes are stored once, not twice. They used to be embedded in the GLB and written out beside it; on a real room pack that was 92% of a 6.9 MB model duplicated against the files next to it, carried in every publish.
- The GLB no longer stands alone. Opened in another tool it renders untextured, because its textures live beside it in the mod rather than inside it. Within DiceyTable this is invisible; if you need a self-contained file to hand to someone else, export the original rather than the project copy.
If a material is bound to a slot and you clear the assignment, the mesh falls back to the material the model shipped with — which, for a model imported this way, no longer carries textures. Re-assign it rather than leaving it cleared.
Editing a built-in material: it copies itself#
You do not need an explicit "make this editable" step to change a built-in material's properties. Change any field on a built-in material in the Inspector, and the editor transparently:
- Creates a project material with the same id and name, copying the built-in's current (override-aware) property values.
- Applies your edit to that new project copy.
- Leaves every other entity still referencing that id — since the copy shares the built-in's id, everything that pointed at the built-in now resolves to your edited copy instead, without you having to reassign anything.
In effect, the first field you change on a built-in is "Duplicate to edit" — it just happens
automatically rather than through a separate button. If you want an independent copy under
a different id — so the original built-in look stays available elsewhere — use the explicit
Duplicate action instead (material list context menu, or "Duplicate to project" from a
read-only preset tab): that creates a new id (<name> Copy) rather than shadowing the original.
Textures inside a material#
Texture-typed fields on a material (diffuse map, normal map, …) are their own drop targets, separate from the material box itself — drag a texture card from the explorer onto the field's own box to assign it, or use the × to clear it. See Textures for texture-specific concerns like compression and sampler settings.
Common mistakes#
- Clearing a material and expecting the old look back immediately. ⚠ Clearing an entity's
or surface's material (the box's × button) does not currently restore the original
board/token/surface look until the scene reloads — the runtime's material-apply path only
overrides the look when a material id resolves, and a no-op (empty) id is skipped rather
than reverting anything (
TabletopRuntime.ts,applyAssignedMaterial:if (!materialId) { return; }). This is a known gap, not something you did wrong — if the surface looks unchanged after clearing, reload the scene to see the real state. - Editing a built-in material expecting to affect only the selected entity. You are editing the material definition, which every entity referencing that id shares — including built-in presets you have not touched yet elsewhere in the scene. Duplicate first if you want an independent variant.
- Trying to rename or delete a built-in material. You can't — there is nothing in the project to rename. Edit a field (which copies it) or explicitly Duplicate it, then rename the copy.
- Forgetting that "Duplicate" and "edit a built-in" are different operations with different results. Duplicate always gets a new id and never touches other entities. Editing a built-in in place reuses the built-in's id and therefore does affect every other reference to it.
See also#
- Mod scripting API —
TableObjectDefinition.color, the tint a mod can set at creation.